|
Deb's Scored Hardwood Floors
By Deb Roberts

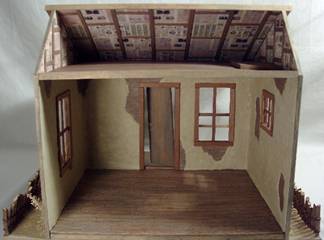
Want to make hardwood floors without going to the expense of purchasing wood flooring? That’s easy! Simply use the kit floor and score the planks directly into the wood. To do this, you’ll need a ruler, pencil and a sharp xacto blade. A clear quilter’s ruler is the best choice for marking off the floor but any ruler will work.
Begin with marking off the distance between the horizontal lines on the floor. I used a 1/2 inch distance for this plank floor. For a more traditional hardwood floor style, you’d want to take the distance down to ¼ inch. I used a pencil to make tic marks on the floor as my guidelines for the horizontal lines.

Once the tic marks were in place, I turned the ruler horizontally and drew the lines across the floor.

The next step is to draw on the vertical lines to separate the strips into planks. Visualize a real hardwood or plank floor and stagger your vertical lines.

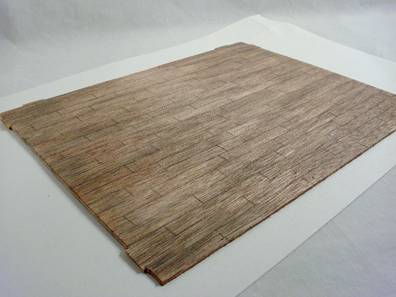
Using a sharp xacto blade, cut into the guidelines on the floor; vertical lines first and then the horizontal. Don’t worry about erasing your pencil lines. Those lines add depth and shadow to the scoring.

Stain the floor and allow the stain to dry. Apply a light coat of varnish to seal the wood.
You can still use this same method for scoring the floors even if you’re not aging a house. If you’re not aging a house, stop at this step and add two more coats of poly varnish to the floors, sanding between each coat to get a glossy finish. To age the floor, continue on with the following steps.
After the varnish is dry, it’s time to distress and age the floor. Using a heavy grit sandpaper, rough up the floor just a little. Sand a little harder in traffic areas such as in front of the door, windows or wherever you imagine many feet to pass to lighten those areas.
Mix water and grey paint in a 3:1 ratio so you have a dirty wash to apply to the floor. Using a paintbrush, apply the dirty wash in varying degrees of heaviness across the floor. It should be darker in the corners and around the edges. Toward the center of the floor, apply heavier streaks at random. Use your brush to even out the dirty wash so there are no visible streaks or sharp lines. Visualize a real life dirty floor and make your miniature look the same. Set the floor aside to dry when finished.

It’s amazing how beautiful an aged floor can be. The dirty wash helps to lift the grain in the wood. Whether new or aged, you’ll find this process to be the easiest and one of the most realistic ways to add hardwood floors to your dollhouse.
Return to the March Newsletter...
|